What You'll Need:
1. Elmer's Glue
2. Crazy Glue or Gorilla Glue
3. Scissors
4. An umbrella
5. Your favorite ribbon
6. Accessories
7. Sewing thread and sewing needle (not pictured)
Step 1.
Take your ribbon and cut several even strips. They look a little long, I know, but this is because we'll be joining the ends together to make a bow. (I know that satin isn't the best choice for something meant to be in the rain-- grosgrain would stand up much better to the weather-- but this color was just so beautiful!)
Step 2.
Use glue to join the ends into a loop, with the shiny or patterned side facing out. To make sure the ribbon really won't come apart, you can also sew the ends together instead. Do this too all your ribbon strips.
Step 3.
After your ribbon loops are dry, take it and pinch the center in. Take your sewing needle and thread and jab it right through the pinched in section to secure the shape. Wrap the thread around the middle 2-5 times (depending on the thickness and stiffness of your thread) and tie a knot.
Step 4.
Take some more of your ribbon and fold it in half, with the shiny or patterned side facing out. Wrap it around the middle of your bow and sew the end shut. Do this to all your ribbon loops.
Step 5.
Admire your hard work. It's tedious... but look how cute these bows are!
Step 6.
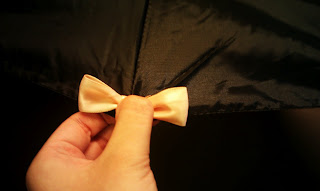
Grab your umbrella, Gorilla Glue and your bows. Decide how you want to decorate your umbrella and get to work! With this kind of glue, I find that putting it on the bow instead of the umbrella helps to keep it from sliding around while drying helps. Press and hold your bow in place for 30 - 60 seconds. Do this for all your bows.
Step 7.
Lastly, add any accessories you'd like! I added pearls, but you can add whatever tickles your fancy. That's it!
We hope you enjoyed our first tutorial! Leave us a comment and let us know what kind of tutorials you'd like to see in the future.


No comments:
Post a Comment