Last week, we posted our first ever tutorial on working with ribbon. We plan on posting a new tutorial every other week. One of our Facebook fans has suggested that we post a tutorial on knitting with ribbon, which will be done next. But what about weeks following? Here are a few ideas of what we have in store:
• Swarovski stilettos
• Wedding veil
• Various necklaces
• Revamping old clothes
• Decorating fake eyelashes
• Hair bows
• Dog harness
• Yoga mat sling
• Lumbar support pillow
and much more! What do you think of our list? What should we add?

Monday, July 30, 2012
Tuesday, July 24, 2012
Ribbon Works: Umbrella Tutorial
Welcome to our first crafting tutorial! In this instructional, I'll be showing you how to use ribbon and other accessories to decorate an umbrella. Why an umbrella? Why not! Here in NYC, it gets very rainy and what better way to show off a little flair than while out and about? So let's begin...


What You'll Need:
1. Elmer's Glue
2. Crazy Glue or Gorilla Glue
3. Scissors
4. An umbrella
5. Your favorite ribbon
6. Accessories
7. Sewing thread and sewing needle (not pictured)

Step 1.
Take your ribbon and cut several even strips. They look a little long, I know, but this is because we'll be joining the ends together to make a bow. (I know that satin isn't the best choice for something meant to be in the rain-- grosgrain would stand up much better to the weather-- but this color was just so beautiful!)

Step 2.
Use glue to join the ends into a loop, with the shiny or patterned side facing out. To make sure the ribbon really won't come apart, you can also sew the ends together instead. Do this too all your ribbon strips.


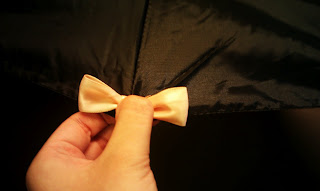
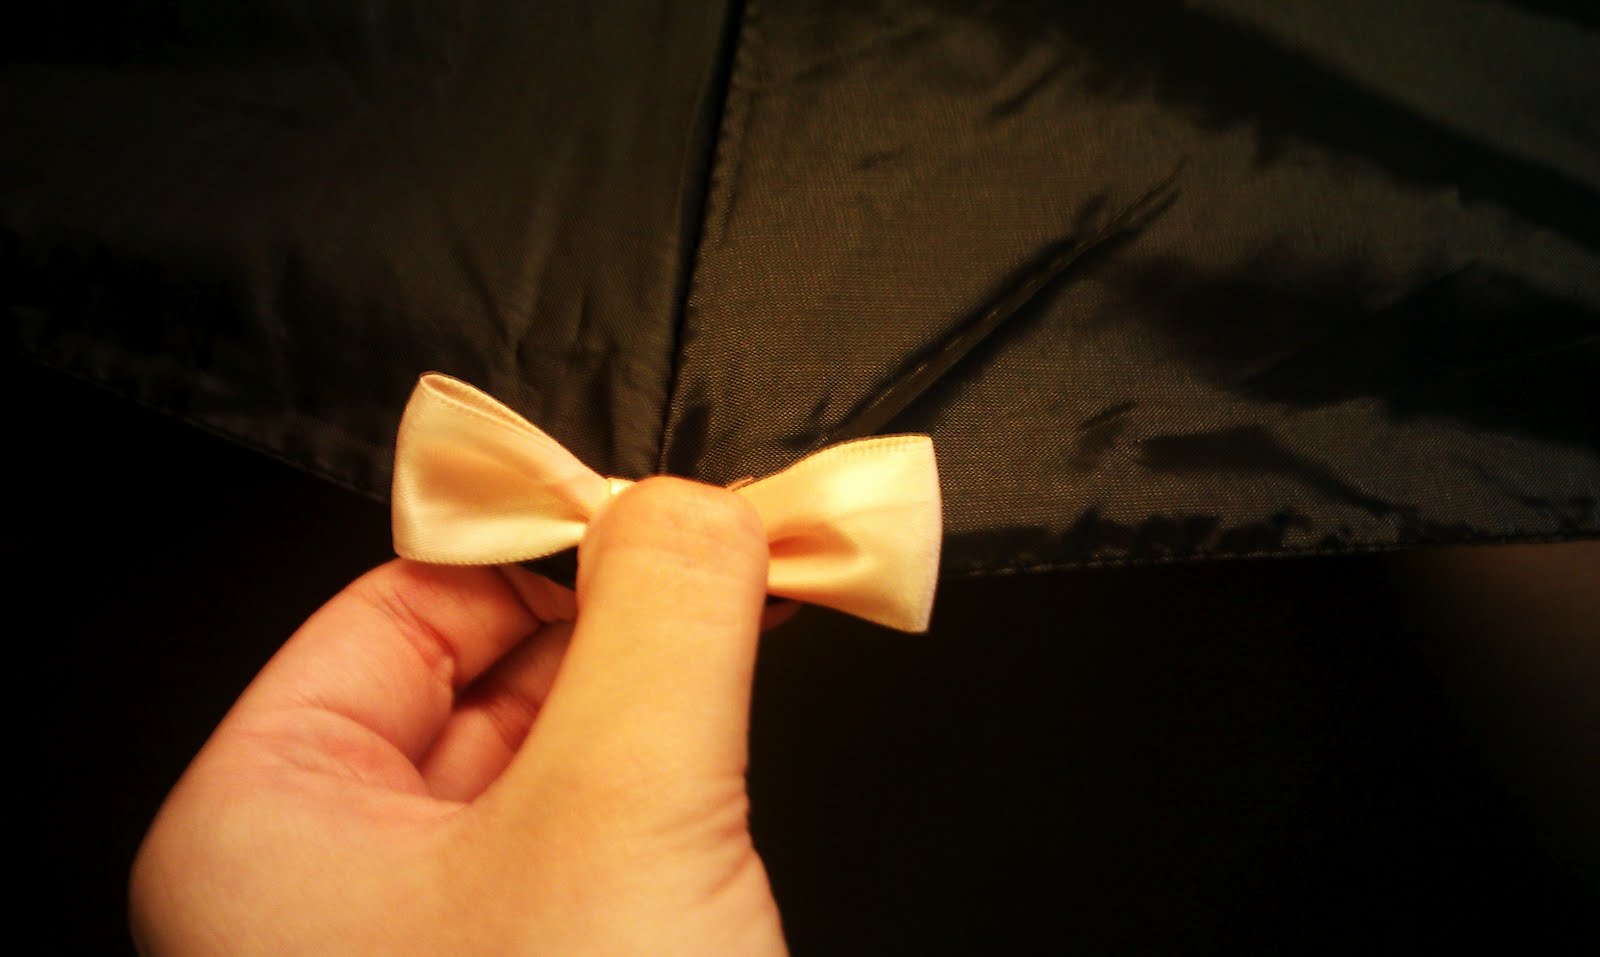
Step 3.
After your ribbon loops are dry, take it and pinch the center in. Take your sewing needle and thread and jab it right through the pinched in section to secure the shape. Wrap the thread around the middle 2-5 times (depending on the thickness and stiffness of your thread) and tie a knot.


Step 4.
Take some more of your ribbon and fold it in half, with the shiny or patterned side facing out. Wrap it around the middle of your bow and sew the end shut. Do this to all your ribbon loops.

Step 5.
Admire your hard work. It's tedious... but look how cute these bows are!

Step 6.
Grab your umbrella, Gorilla Glue and your bows. Decide how you want to decorate your umbrella and get to work! With this kind of glue, I find that putting it on the bow instead of the umbrella helps to keep it from sliding around while drying helps. Press and hold your bow in place for 30 - 60 seconds. Do this for all your bows.


Step 7.
Lastly, add any accessories you'd like! I added pearls, but you can add whatever tickles your fancy. That's it!
We hope you enjoyed our first tutorial! Leave us a comment and let us know what kind of tutorials you'd like to see in the future.
Monday, July 2, 2012
Crafting with Crystals

Today I undertook a little project of my own. You see, we're going to be producing a mailer soon and we needed a mascot! Last week I spent some time drawing up a few designs and I didn't think it would feel complete without our signature bear. We ordered a bear and when I found it on my desk this morning, it was time to get to work! One of our staff, Lina, made the bow and as soon as she finished, I sat armed with nothing but a pin, paper, glue and Swarovski crystals to decorate it with. I plopped a glob of glue on paper and used the pin to carefully spread it on the back of each crystal. In 20 short minutes, my creation was complete! Now you might be thinking, Why is she telling me this? Well, to show you how easy it is to jazz up something as simple and classic as a teddy bear! It takes no time at all to make a gift to someone stand out.
Subscribe to:
Posts (Atom)